


In this article, we will explore what iron-on patches are, the different types available, and the benefits they offer, and we will provide a detailed step-by-step guide on how to iron on patches properly.
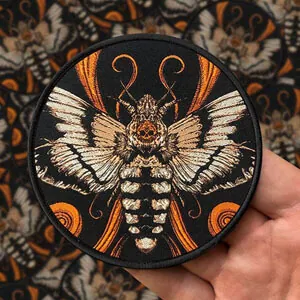
Iron On Patches

Iron-on patches are decorative pieces of fabric embroidered with a design or logo. Heat can attach them to clothing, bags, hats, and other items. These patches are made from high-quality thread and are often backed with a heat-activated adhesive that allows them to be attached to the fabric with heat transfer and pressure. Iron-on custom patches can be customized to fit any design or style, making them a popular choice for individuals and organizations looking to add a personal touch to their clothing and accessories. These patches offer great comfort and ease of attachment; Only you need to know how to iron-on them properly.
Step-by-Step Guide (How to Iron on Patches)
Follow these instructions to achieve a secure and professional-looking result.
Material required
- Iron-on patches of your choice
- Garment or fabric to apply the patch to
- An iron (preferably without steam)
- Clean cloth or a pressing cloth
- Ironing board or heat-resistant surface
Choose the Placement
Take some time to determine the ideal placement for the patch on your garment. Consider factors such as the design, size, and shape of the patch, as well as how it will complement the overall aesthetics.
Prepare the Patch & Garment
If your patch has a plastic film on the back, remove it before starting. Make sure that both the patch and the garment are thoroughly clean and devoid of any dust or debris.
Set Up the Ironing Surface
Place your ironing board or heat-resistant surface on a sturdy, flat surface. Ensure you have ample space to maneuver the iron comfortably while working on the patch application.
Heat the Iron
Set your iron to the appropriate temperature according to the fabric of your garment. Refer to the garment’s care instructions for the recommended heat setting. It’s crucial to use the correct temperature to avoid damaging the fabric.
Position & Secure the Patch
Position the patch on the desired area of your garment, ensuring that the adhesive side is facing down. Double-check the placement to ensure it is centered and aligned correctly.
Note
Apply Heat & Pressure
Place the clean or pressing cloth over the patch to protect it from direct heat. Press the hot iron firmly onto the cloth and patch. Apply steady pressure, moving the iron back and forth for about 15-30 seconds. Ensure that you cover the entire patch area with the iron.
Note
It is recommended to refer to the instructions provided with your particular patch to achieve optimal results.
Check the Adhesion
Carefully lift a corner of the pressing cloth and check if the patch has adhered to the fabric. If the patch lifts with the cloth, it needs more heat and pressure. Place the cloth back and continue applying heat for a few more seconds.
Let it Cool and Test
Once the patch is securely adhered, remove the pressing cloth and allow the garment to cool completely. This cooling process ensures that the adhesive sets properly. After cooling, gently tug at the corner of the patch to verify that it is securely attached.
Repairing Loose Patches
Over time, patches may loosen or peel off due to wear and tear. If you notice a loose patch, reapply heat and pressure using the same steps mentioned earlier. This should reactivate the adhesive and secure the patch back in place.
Tips for how to Iron-on Patches properly

To enhance your iron-on patching experience and achieve the best results, consider the following tips.
Test on a Scrap Fabric First
If you’re uncertain about the heat setting or the compatibility of the patch and fabric, test the process on a scrap piece of fabric. This allows you to adjust the heat and ensure a successful application.
Use a Press Cloth or Parchment Paper
Using a clean cloth or a piece of parchment paper between the iron and the pressing cloth can provide an additional layer of protection for delicate fabrics. It prevents the patch from sticking to the iron and helps distribute heat evenly.
Apply Pressure Evenly
Maintain consistent pressure while ironing to ensure the entire patch adheres uniformly. This helps avoid air bubbles or areas where the patch may peel off.
Avoid Direct Heat on Sensitive Fabrics
For fabrics that are sensitive to heat or may scorch, such as synthetics or delicate materials, lower the iron’s temperature accordingly. You can opt for lower-level heat and a longer ironing time to prevent damage.
Consider Sewing for Extra Security
While iron-on patches are generally secure, sewing around the edges of the patch can provide extra reinforcement. This is particularly useful for patches on items subject to frequent washing or high stress, such as patches on jeans’ back pockets.
Creating Iron-On Patches

An embroidery patch is ironed on after the design is created. The design can be created using computer software or hand-drawn on paper. When the design is completed, it is moved onto a specific type of paper called a transfer sheet. The transfer sheet is then used to create the embroidery design on a piece of fabric with an embroidery machine.
After embroidery, the fabric is cut to the required shape and dimensions for the patch. A heat-activated adhesive backing is then applied to the back of the patch to allow for easy attachment using heat and pressure. The finished patches are examined for quality and parcelled up for loading or distribution.
Types of iron-on patches
There are several types of iron-on patches available in the market, each offering its own unique features and style. The most common types are:

Embroidery iron-on Patches
Embroidered patches feature intricate designs stitched onto a fabric base, adding texture and depth to your garments.
Woven iron-on Patches
Woven patches are created using thin threads woven together, resulting in a smooth and detailed design that works well for intricate logos or lettering.
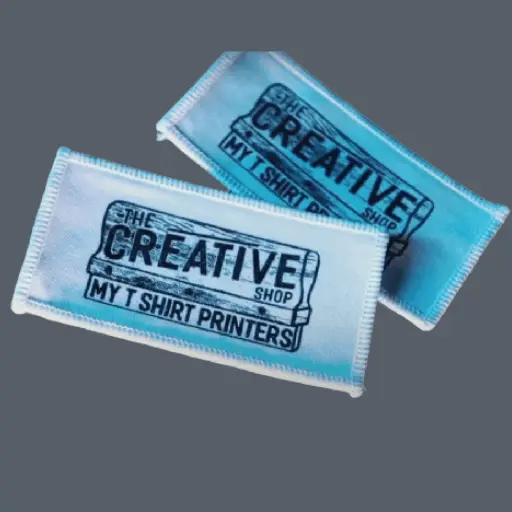
Printed iron-on Patches
Printed patches are made by transferring a design onto fabric using advanced printing techniques, allowing for vibrant and detailed artwork.
Benefits of Iron-On Patches
Iron-on patches have gained popularity due to their numerous benefits, which make them a preferred choice for many individuals. Here are some key advantages of using iron-on patches.
Ease of Application
One of the main advantages of iron-on patches is how easy they are to apply. With a household iron and a few simple steps, you can transform your clothing or accessories in no time. It requires minimal effort and no special skills, making it accessible to everyone.
Versatility
Iron-on patches offer endless possibilities for customization and personalization. You can choose from a wide range of designs, colors, and sizes to match your style or express your individuality. From adding a pop of color to your denim jacket to personalizing your backpack, the options are limitless.
Affordability
Compared to other methods of customization, iron-on patches are relatively affordable. Moreover, they offer a cost-effective method to refresh your wardrobe or revive old garments. Instead of purchasing new items, you can breathe new life into your clothing by simply adding patches.
Non-Permanent Option
Unlike sewing or gluing patches, iron-on patches provide a non-permanent solution. These patches can be effortlessly detached or replaced if you decide to change the design or if you want to revert to the original garment. This flexibility permits you to swap your style as wanted.
Durability
When applied correctly, iron-on patches can withstand regular wear and washing. The adhesive backing ensures a strong bond with the fabric, making the patches durable and long-lasting. This durability is especially important for patches on frequently used items like jackets, jeans, or bags.
Applications

Iron-on patches have many applications, both practical and decorative. Here are some examples.
Branding & Marketing
Iron-on patches offer businesses an efficient method to enhance brand visibility and showcase their logo. They can be attached to uniforms, hats, bags, and other items, allowing employees to represent the company wherever they travel.
Fashion
Iron-on patches have gained significant popularity due to their ability to add a unique and personal element to garments and accessories. They can be attached to denim jackets, backpacks, hats, and more, creating a stylish and personalized look.
Sports Teams
Iron-on patches are commonly used by sports teams to create a cohesive and professional look. They can be attached to uniforms, hats, bags, and other items, promoting team spirit and identity.
Causes & Awareness
Iron on patches can be used to promote a cause or raise awareness of a particular issue.
Final comments
When it comes to iron-on patches, knowing how to properly iron them is crucial for achieving a comfortable and secure attachment. By following the step-by-step guide, you can confidently apply iron-on patches and achieve professional-looking results. Remember to consider the fabric type, use appropriate heat settings, and apply even pressure for optimal adhesion. Additionally, explore creative uses beyond clothing to unleash your imagination and create unique, customized items.
With iron-on patches, you can effortlessly transform simple garments into beautiful and artistic masterpieces. So, unleash your creativity, grab your favorite patches, and start adding that extra flair to your wardrobe and belongings!