Iron-on patches offer a popular means to personalize garments and infuse them with individual styles. However, there may come a time when you want to remove these patches to either replace them with new ones or restore the original appearance of the fabric. Whether you want to replace it with a new design or the patch has become worn or damaged, removing it in a proper way is essential to avoid damaging the garment.
In this guide, we will explore various techniques to help you remove iron-on patches without leaving behind residue or damaging the fabric. Whether you’re dealing with a misplaced or outdated patch, this comprehensive guide will provide step-by-step instructions for how to successfully remove iron-on patches.
Iron-On Patches
Iron-on patches are decorative or embroidered patches that can be attached to fabric using heat. They are designed to be easily applied by placing the patch on the desired area and using an iron to adhere it to the fabric. The patches typically have a special adhesive on the back that melts when heated, bonding the patch to the fabric. Applying Iron-on patches add decorative or personalized elements to clothing, bags, hats, and other fabric items. Iron-on patches offer a convenient and creative way to express individuality and style.
Before you begin the removal process, gather the following tools and materials:
Clothes iron
Clean cloth or parchment paper
Ironing board or heat-resistant surface
Adhesive remover (optional)
Rubbing alcohol (optional)
Cotton swabs or soft cloth
Mild detergent (if needed)
Preparing the Garment
Before removing the iron-on patch, it is crucial to know how to remove iron on patches safely and prepare the garment properly. Follow these steps:
To safeguard the garment from direct heat, turn the garment inside out.
The iron should be preheated to a gentle or moderate temperature without using steam.
Place the garment on an ironing board or a heat-resistant surface.
Applying Heat to the Patch
Applying heat is the key to loosening the adhesive of the iron-on patch. Follow these steps:
Place a clean cloth or bakery paper above the patch to shield it from direct heat.
Press the heated iron firmly onto the cloth or parchment paper for 15 to 20 seconds.
Lift the iron and check if the patch has started to loosen. If required, repeat the procedure briefly.
Peeling off the Patch
Once the adhesive has been loosened, carefully peel off the iron-on patch using your fingers or a pair of tweezers. Follow these steps:
Delicately raise a single corner of the patch and commence the process of peeling it off from the fabric.
Take your time and avoid pulling too hard, as doing so may potentially result in harm to the garment.
If the patch resists, apply heat again and try peeling it off again.
Removing Residue
After removing the iron-on patch, there may be adhesive residue left on the fabric. Here’s how to deal with it:
If the residue is minimal, you can try rubbing it off gently with your fingers.
For more stubborn residue, apply a small amount of adhesive remover or rubbing alcohol to a cotton swab or soft cloth.
Gently rub the residue
Dissolve the residue by gently rubbing it in a circular motion.
Continue until all residue has been eliminated.
If needed, wash the garment with mild detergent to remove any remaining residue.
Washing and Finishing
After removing the iron-on patch and residue, it’s essential to wash and finish the garment properly. Follow these steps:
Please consult the care instructions accompanying the garment to ascertain the suitable washing method.
If the fabric allows, wash the garment in cold water to remove any remaining adhesive or residue.
Utilize a gentle detergent and refrain from employing bleach or harsh chemicals.
Once washed, hang the garment to air dry or follow the care instructions for machine drying.
Once dry, you can iron the garment in the appropriate setting to smooth out any wrinkles.
Alternative Methods for removing iron on Patches
While heat is the most common method for removing iron-on patches, there are alternative approaches you can try. These include:
Freezing Method
z
Place the garment with the patch in a plastic bag and seal it tightly.
Place the bag in the freezer and let it stay there for several hours or overnight.
Retrieve the bag from the freezer and carefully extract the garment from it.
Start peeling off the patch gently from one corner. The freezing temperature should make the adhesive less sticky, allowing easier removal.
If necessary, employ a gentle adhesive remover or rubbing alcohol to eliminate any leftover residue.
Heat and Peel Method (Using a Hairdryer)
Adjust your hairdryer to the maximum heat setting available.
Aim the hot air directly at the patch and move the dryer around to evenly distribute the heat.
Heat the patch for about 1-2 minutes until you feel the adhesive softening.
Use your fingernail, a plastic scraper, or the edge of a credit card to gently lift one corner of the patch.
Slowly peel off the patch while continuing to apply heat with the hairdryer if needed.
Remove any remaining adhesive residue with an adhesive remover or rubbing alcohol.
Solvent Method (using acetone or nail polish remover)
Check the fabric care label to ensure it can withstand solvents such as acetone or nail polish remover.
Before application, test the solvent on a small, discreet area of the fabric to ensure that This process does not result in any harm or color fading.
Put a small quantity of the solvent onto a neat cloth or cotton ball.
Gently dab the cloth or cotton ball onto the patch, focusing on the edges and any visible adhesive.
Allow the solvent to penetrate the patch for a few minutes.
Start peeling off the patch from one corner using any card corner, plastic scraper, or sharp-edged tool.
If needed, reapply the solvent to stubborn areas and continue peeling until the patch is fully removed.
Cleanse the fabric with any gentle detergent and water to eliminate any solvent residue.
Remember to exercise caution, follow safety precautions, and test these methods on a small, discreet area of the fabric prior to applying them to the entire patch or garment.
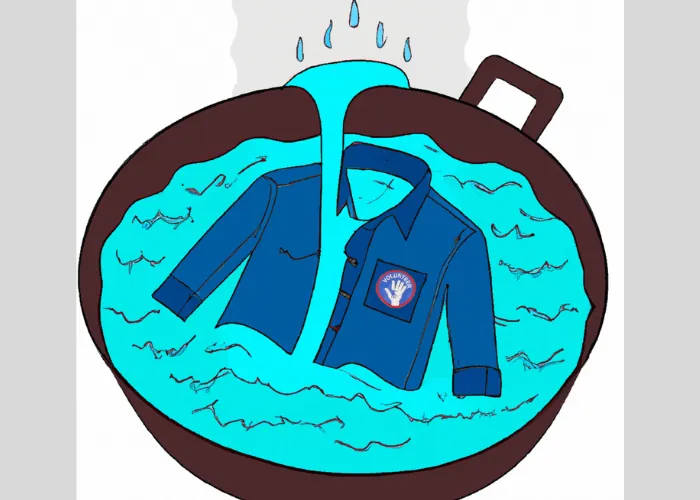
Hot Water Soak
Prepare a basin or sink: Prepare a basin or sink with comfortably warm water. Ensure the water temperature is adequately hot but not boiling to safeguard the fabric from potential harm.
Submerge the garment: Place the garment with the iron-on patch into the hot water. Ensure that the patch is fully submerged.
Soak the garment: Allow the garment to soak in the hot water for approximately 15-20 minutes. This will aid in loosening the adhesive.
Test the patch: After the soaking time, gently try to peel off the patch from one corner. If it easily starts to come off, continue peeling it off.
Handle hot water with care, and consider using protective gloves if needed. Additionally, be mindful of the fabric’s care instructions to ensure it can withstand the hot water soak method.
White Vinegar Method
Mix water and white vinegar equally in a bowl or container to make a solution.
Immerse a clean cloth piece or cotton ball into the solution.
Dab the cloth or cotton ball onto the iron-on patch, saturating it with the vinegar mixture.
Let the vinegar mixture sit on the patch for approximately 10-15 minutes to weaken the adhesive.
Gently scrape off the patch using your fingernail, a plastic scraper, or any edgy object. Begin from one side and remove it gradually.
If needed, reapply the vinegar mixture and continue peeling until the patch is fully removed.
Cleanse the fabric with gentle detergent and water to eliminate any residual vinegar solution.
Follow the safety precautions when handling vinegar with care to avoid contact with eyes or sensitive skin.
Assessing Fabric Compatibility
Before attempting to learn how to remove iron-on patches from a garment, it’s crucial to assess the fabric’s compatibility with the removal methods. Different fabrics may react differently to heat, solvents, or other removal techniques. Considerations for fabric compatibility:
Fabric Type: Identify the type of fabric the patch is attached to, such as cotton, polyester, denim, or silk. Some fabrics are more heat-resistant or delicate than others, requiring specific approaches for safe removal.
Heat Sensitivity: Determine the fabric’s sensitivity to heat. Heat-based removal methods, like using an iron or heat gun, can damage or scorch certain fabrics. Delicate fabrics, synthetic materials, or blends may require alternative removal techniques to prevent heat damage.
Color Fastness: Check the fabric’s color fastness, particularly if you plan to use solvents for patch removal. Solvents have the potential to cause color bleeding or fading, especially on fabrics with unstable or non-colorfast dyes. Conduct a spot test on a discreet area of the fabric to ensure it won’t be adversely affected.
Embellishments or Trims: Take into account any additional embellishments, trims, or decorative elements on the garment. These could be delicate, sensitive to heat, or prone to damage from certain removal methods. Carefully consider how the removal process may impact these elements.
Vintage or Delicate Fabrics: If the garment is vintage or made from delicate fabrics like lace or silk, extra caution is required during patch removal. These fabrics are often more susceptible to damage and may necessitate gentler removal techniques or professional assistance.
By assessing fabric compatibility, you can choose the most appropriate removal method and minimize the risk of damaging the garment while effectively removing the iron-on patch.
Safety Precautions
Consider the following tips and precautions when removing iron-on patches to learn how to remove iron on patches safely and effectively:
Heat Safety
When using heat methods such as an iron or hairdryer, always exercise caution to avoid burns or injury.
Set the heat to a low or medium setting and avoid using high heat to prevent damage to the fabric.
Keep the iron or hairdryer away from your skin and other flammable objects while in use.
Allow the heat source to cool down completely before storing it.
Chemical Safety
If you’re using adhesive removers or solvents, attentively follow the manufacturer’s instructions.
Before applying adhesive removers or solvents to the entire patch or garment, test them on a small, discreet area of the fabric.
Ensure that you work in a properly ventilated space when utilizing adhesive removers or solvents to avoid inhaling vapors. Consider wearing a mask or ensuring good air crossing.
Take precautions to prevent any contact between the chemicals and your eyes, mouth, or open wounds. If accidental contact occurs, rinse the affected area with ample water and, if necessary, seek medical assistance.
Ensure that adhesive removers and solvents are stored in a secure place inaccessible to children and pets.
Fabric Safety
Check the care label of the fabric to ensure it can withstand the removal method you’re using.
Perform a test of the removal method on a small, discreet area of the fabric to ensure it doesn’t cause damage, discoloration, or shrinkage.
Exercise patience and take your time during the patch removal process to avoid damaging the garment.
Be gentle when peeling off the patch to prevent ripping or harming the fabric.
If the fabric is delicate or valuable, consider seeking professional help or advice for patch removal.
Personal Protection
When working with chemicals or using heat methods, using gloves is recommended to protect the skin.
If working with chemicals in a well-ventilated area, it is advisable to use a mask to safeguard the respiratory system.
Please adhere to any additional safety measures specified on the product labels or included in the provided instructions.
By following these safety precautions, you can safely remove iron-on patches while minimizing the risk of accidents or damage to yourself and the fabric.
Conclusion
In the world of fashion and personalization, iron-on patches have become a beloved tool for expressing individuality. Nevertheless, when the moment arrives to detach these patches, it’s essential to know how to remove iron on patches safely and effectively. Fortunately, there are various alternative methods available, each with its own merits. Whether you choose the heat and peel method, freezing, adhesive removers, white vinegar, or hot water soak, remember to prioritize safety. Be cautious when using heat, follow instructions carefully when using chemicals, and test any method on a small, inconspicuous area first.
Additionally, pay attention to fabric care instructions to prevent damage during the patch removal process. By incorporating these safety precautions, you can confidently and successfully remove iron-on patches, allowing you to explore new styles and reinvent your wardrobe. Embrace your creativity and enjoy the journey of personalizing and transforming your garments with ease and care.
FAQs
It’s not recommended as the adhesive may become weakened or damaged during the removal process, but it can be reused if the adhesive backing reapplies.
In most cases, any marks or residue left behind can be successfully removed using the methods mentioned in the article.
While heat is the most effective method, alternative approaches like freezing or adhesive remover can be attempted.